
$2,689 pp (USD)
This tour is offered in ZAR.
Show rate in ZAR
Arrival
Arrival

Day 1
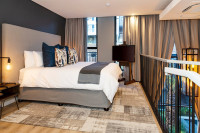
Overnight in Windhoek
Overnight in Windhoek
Upon your arrival at Hosea Kutako International Airport, a Car Hire representative will warmly welcome you. They will assist with your airport transfer to the Car Hire office, where you will receive a thorough briefing and take possession of your rental vehicle for your Namibian safari.
At the Car Hire office, a MoAfrika Tours representative will meet you to provide an overview of your Namibia safari itinerary and clear directions to your first night’s accommodation.
Please note that dinner this evening is not included. You are welcome to enjoy a meal at your accommodation or choose from a selection of excellent restaurants in the city.
- Main Destination:
- Windhoek (City)
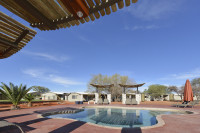
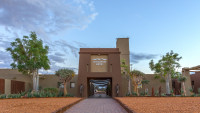
- Accommodation:
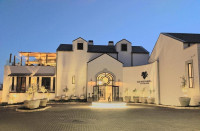
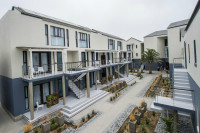
- The Weinberg
- Meals & Drinks:

Day 2
Windhoek – Kalahari
Windhoek – Kalahari
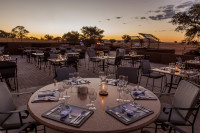
Depart Windhoek in the late morning, travelling south on the B1 toward Mariental. Shortly before reaching the town, turn off the main road for a short drive to your lodge, arriving in time for a light lunch. Settle in and relax before joining an included sunset drive through the Kalahari, where you’ll learn about the unique wildlife and adaptations that allow life to flourish in this arid landscape. Return in the early evening to enjoy a well-deserved dinner under the desert sky.
- Main Destination:
- Kalahari Region
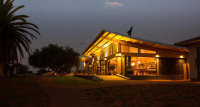
- Accommodation:
- Kalahari Anib Lodge

- Meals & Drinks:
Day 3
Kalahari – Sesriem
Kalahari – Sesriem
Today’s journey is a longer drive, with much of the route on gravel roads, so be sure to maintain your tire pressure at 1.8 bar. Heading south and re-joining the B1, travel to the town of Mariental, where you can refuel before continuing west toward Maltehohe. From there, descend the Zaris Pass into the Namib Desert—a perfect spot to pause and take in the stunning desert views while enjoying a packed lunch under the shade of a camelthorn tree.
You’ll arrive at the lodge by mid-afternoon, where you’ll be greeted with a refreshing drink. Spend the rest of the afternoon relaxing with a siesta or a swim in the lodge’s pool before enjoying dinner under the starry desert sky.
- Main Destination:
- Sesriem (Town)
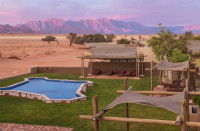
- Accommodation:
- Sossusvlei Lodge

- Meals & Drinks:
Day 4
Day Visit to Sesriem
Day Visit to Sesriem
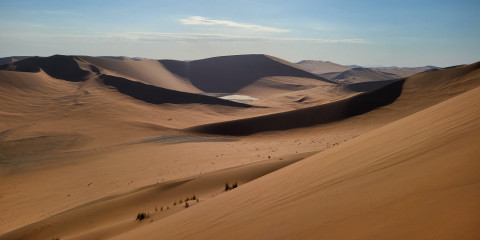
Start the day pre-dawn to reach the park gates at sunrise, then travel 54 km into the Dune Sea. We recommend proceeding past Dune 45 to use the cooler morning. At the 4x4 parking, switch modes for the last 5 km to Deadvlei. Here, one of the world’s largest dunes (355 m) is worth climbing for the views. Running down into Deadvlei is fun.
See striking 900-year-old dead trees there—ideal for photography, but don’t touch them. Explore, then go a few kilometres further to Sossusvlei to wander. In the rainy season, water may transform the vlei into a wildlife haven.
As it heats up, visit nearby Sesriem Canyon. Spend the rest of the day relaxing—rest, read, or swim—before another magical dinner under the desert stars.
- Main Destination:
- Sesriem (Town)
- Accommodation:
- Sossusvlei Lodge
- Meals & Drinks:

Day 5
Sesriem to Swakopmund
Sesriem to Swakopmund
Today’s journey transforms from desert to coast. Depart at 8:00 AM, allowing time for scenic stops.
First, visit Solitaire (83 km) for its famous apple crumble pie and quirky photo opportunities.
Continue on the C14, stopping at the Tropic of Capricorn, Gaub Pass, and Kuiseb Pass for breathtaking desert views.
Arrive in Walvis Bay by early afternoon and visit the Yacht Club to plan tomorrow’s activities: a dolphin cruise, a 4x4 trip to Sandwich Harbour, or both. We recommend Catamaran Charters.
Then drive 35 km along the coast to Swakopmund to check into your guesthouse for two nights. For dining, we highly recommend the Jetty Restaurant—book in advance.
- Main Destination:
- Swakopmund (City)
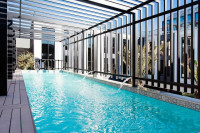
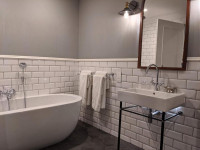
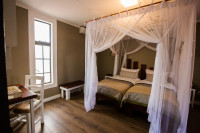
- Accommodation:
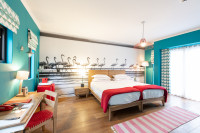
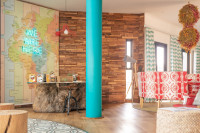
- The Delight Swakopmund

- Meals & Drinks:

Day 6
Swakopmund
Swakopmund
Today is yours to enjoy at your own pace. Swakopmund, a charming coastal holiday town, offers plenty to explore. Visit the craft market, the Crystal Gallery, the Jetty, or the Aquarium. If you prefer a more relaxed day, you can enjoy the safe beaches or indulge in the town’s many excellent restaurants.
Alternatively, you might opt for a dolphin cruise or a day tour to Sandwich Harbour in nearby Walvis Bay—both are unforgettable experiences.
Meals today are at your own expense, with fantastic dining options like The Brauhaus, The Tug, or Blue Grass to choose from.
- Main Destination:
- Swakopmund (City)
- Accommodation:
- The Delight Swakopmund
- Meals & Drinks:

Day 7
Swakopmund to Windhoek
Swakopmund to Windhoek
Before setting off for Windhoek, remember to inflate your tires to the correct pressure, as the return journey will be on tarred roads. If time permits, consider stopping at Spitzkoppe (entrance at your own expense)—a stunning destination well worth a visit.
Following the B2, you’ll pass through the quaint towns of Usakos, Karibib, and Okahandja. In Okahandja, take a break to explore the vibrant street craft market, located just off the B2, and enjoy lunch at Dede’s (at your own expense) before continuing the short 76 km drive to Windhoek.
Dinner tonight is not included, but we highly recommend Joe’s Beerhouse for a memorable final meal in Namibia. Known for its unique ambiance and delicious cuisine, it’s a must-visit for many travellers. Be sure to book your table in advance to secure your spot!
- Main Destination:
- Windhoek (City)
- Accommodation:
- The Weinberg
- Meals & Drinks:

Day 8
Departure
Departure
Depending on your departure time, you will return your vehicle to the Car Hire office. Be sure to refuel the tank beforehand to avoid any additional charges. After the handover is complete, the Car Hire team will arrange a transfer to the airport, ensuring you arrive with plenty of time for your flight.
- Main Destination:
- Windhoek Airport (Windhoek)
- Accommodation:
- No accommodation (End of tour)
- Meals & Drinks: